...

Tuesday, October 20, 2015

Clinic Hair dye in Blue Black Review

     It's starting to get colder and it's getting darker faster. To match my hair to the colder months, I decided to dye my hair a more sinister color, and a color I've been wanting to dye my hair for a long time, blue black.  
    Since I enjoyed the last Clinic hair dye, which was the red one, I decided to buy the blue black one that they were selling. I went with the regular Clinic hair dye, not the henna one.

NOTE: I had red, bleached hair before I dyed it the blue black hair dye. Therefore, you might not have the same results as I do. 

Process: ****
-As usual,  I made a mess dying my hair. The hair kit was exactly like the last Clinic hair dye I reviewed, with the included comb  and poncho. While I was washing the hair dye out, the water became clear within 20-30 minutes of rinsing it out. The included shampoo and conditioner was sufficient for my short hair, but you can use your own shampoos and conditioners as well.

Color: *****
-I LOVED the color! At first, the dye on my hair looked green , so I started to get worried. But slowly, I saw the color process and it turned into this beautiful blue black color. The blue can be seen in the sunlight and brighter lightings, but it just looks like a really dark blue black color on the hair. However, I saw the blue kinda fading out of my hair after the 2nd wash, so that's upsetting. I didn't really mind if the blue faded because I was aiming to have black hair anyway. But, the blue tint is there!

Price: *****
-It's 8.99, around $9.30 with tax. It's in the drugstore box hair dye range, but with more freebies. You can buy this at any asian beauty store, but you can also order it online if you'd like.

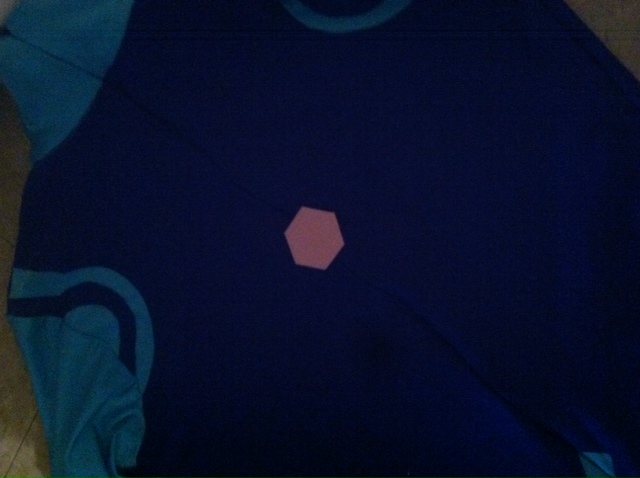
This photo doesn't really show the blue tint, but this is after the 2nd -3rd wash of my hair. 
But, like I said, you can definitely see the blue tint in the sunlight. 


OVERALL: 

I would definitely recommend this hair dye brand. The blue black is actually a blue black, unlike other "blue black" hair dyes that claim that they are the color, but it's just a flat out black. It didn't really damage my hair, and make it feel more softer after dying it. I've gotten a lot of compliments on my hair! Maybe next time I'll purchase the henna version of this one. It does fade quickly; for me it faded within a week or so (depends on how many times you wash you hair, I wash mine nearly everyday ). So, maybe the henna version might work out better next time. 


Tuesday, October 13, 2015

DIY Zero Suit Samus Emblem

DIY Zero Suit Samus Emblem


DO YOU WANT TO LEARN HOW TO MAKE A ZERO SUIT SAMUS EMBLEM? WELL YOU’VE COME TO THE RIGHT PLACE. Mind the caps; I just find it frustrating that you can’t really find tutorials on how to make a proper zero suit Samus cosplay. I’ve researched a lot about I’ve yet to find a tutorial that’ll guide me on how to assemble the entire zero suit Samus costume. If you’re struggling to find a way to make the emblem for the suit, you’ve come to the right place.

Materials needed:
-Light pink and Dark pink craft foam paper
-I got the colors “Pink” and “Medium Pink”

-E6000 glue or a strong fabric adhesive
-Exacto knife or scissors
-Reference photos of the emblem
-Cardboard (to protect the suit on the inside when you apply the E600 or any other strong glue)

Let’s get started!

1.Start studying your reference picture(s) and trace them out onto a sheet of paper. Depending on your back size, you might want to make it smaller or bigger. If your zipper is in the back, don’t worry about it for now. We’ll get to it later.

zero_suit_samus__front_logo_by_hexigonaran-d3ensv6.jpg
This is the front of the suit, and it should be placed on your left breast (the lines on my suit were too thick, so I wasn’t able to stick it on)

zero_suit_samus__back_logo_by_hexigonaran-d3ent2h.jpg
Zero suit samus-21-620x.jpg
These are close ups of the emblem that’s placed at the back of the suit.

NOTE: Not all zero suit samus cosplays are alike! You don’t have to make it perfect, as long a you put in the effort, it should turn out amazing!

2. Start with the hexagon
*NOTE* I screwed up on this part. It looks really messy and weird. I suggest you tape up
the pieces first on the back, then cut it in half and glue it onto the suit using E600 (make
sure you wear a mask, this stuff stinks and can be pretty bad for you)

photo 3.JPGphoto 4.JPG
-I looked up a picture of a hexagon, and zoomed in and out to make it it scale with my suit.

photo 5.JPG
-Cut out a pink piece first. This will be the center of your hexagon
photo 1.JPGphoto 3.JPG
-I traced out the original hexagon shape onto the dark pink foam and traced it. Trace about 0.4 cm’s in width around that stencil.

photo 2.JPGphoto 2.JPG
-The pattern of the hexagon should include 1-2 lines of pink and 2-3 lines of dark pink that surrounds the original hexagon that you drew out. Before I glued the pieces on, I put a piece of cardboard that was about the size of my upper body inside the suit to protect it from sticking to the other side.
-Then, take a strong adhesive (I’m using E6000) and stick it on. I highly recommend you wear a mask when you use E6000 because of the awful smelling fumes it gives off. Make sure you crack a door open so those fumes don’t linger in your room. I used the back of my exacto knife to press the hexagon pattern onto the suit.
NOTE: If the zippers on the back of the suit, then you have to cut your design in half and stick it on. I suggest you take tape, attach the pieces together by applying the tape to the back, and then sticking it on rather then putting them on individually like I did here (it came out gappy and messy looking).

3. Start making the weird horizontally hexagon shapes.

-It’s basically the same process as the hexagon. I didn’t make these as detailed because it took too much of my sleeping time away, my back and neck was killing me from bending down too long to cut them out, and I got lazy.

photo 4.JPG
-Again, the width of each line going from pink, dark pink, pink, dark pink, should be 0.4 cm. It shouldn’t be too thick or too thin.

photo 1.JPG
This is how mine turned out. As for the line sticking out of it, I measured about 4 cm’s and 0.4 cm width on it from where it begins to where it ends. The angled line was 2 cm’s with a 0.4 cm width.

-Repeat this for all the others.

zero_suit_samus__back_logo_by_hexigonaran-d3ent2h.jpg

photo 4.JPG

As you can see, mine’s stuck straight up instead of being angler, which is my mistake, but it still looks cool.

4. After you’ve made all the pieces, stick them onto the suit using E6000 glue.

*MAKE SURE YOU WORK IN A WELL VENTILATED AREA AND WEAR A MASK TO PREVENT BREATHING IN THE DANGEROUS FUMES!*