
DO YOU WANT TO MAKE YOUR OWN ZERO SUIT SAMUS'S PARALYZER?
WELL THERE'S FINALLY A TUTORIAL ON HOW TO MAKE YOUR OWN!
Comic Con is just around the corner, and I’m sure everyone’s getting a little nervous about perfecting their costumes and stuff. Despite this being a fashion blog, fashion comes in all shape and sizes. In this case, the shape we’re working on is the form of a gun.
I'm sorry for the all caps. I'm just frustrated that there isn't a tutorial online that doesn't really explain HOW to make your own paralyzer. After months of thinking and mapping out various diagrams, I've figured out a cheap way to make it on your own (I spent around $30 (+tax) at Michaels buying the materials. It’ll probably be cheaper if you already have the materials listed below).
Materials needed:
-1-2 foam boards (I'm just using the large foam boards at Dollar Tree that you use for your presentations)
-150 grit sandpaper (to smooth out your gun)
-Newspaper and Elmers glue all glue (yes, we’re going to be doing paper mache)
-Americana multi purpose sealer (acts as a sealer for the paper mache, and a primer for the paints)
-Folk Art paints (I bought a mix of the multi surface and the acrylic version): Medium Gray, Pure Black, and a light brown color (I forgot the name)
-*NOTE* if you have any other acrylic paints that work for you, you can use them. I just
used this brand because it was cheap (like around a dollar or less) and had pretty good
opacity according to some reviewers.
-Exacto Knife
-Pencil and Paper
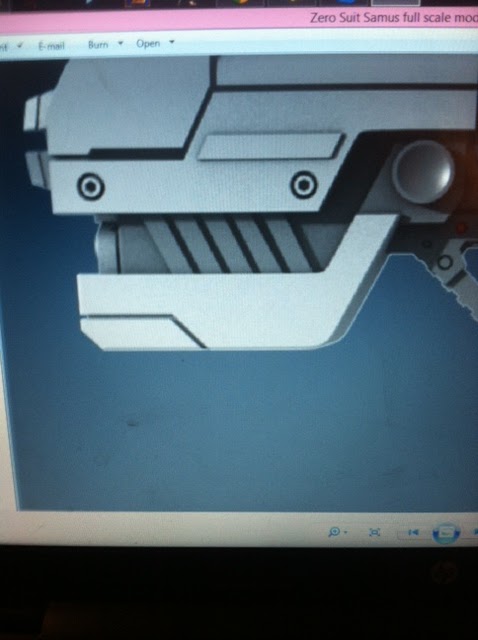
-Reference picture of the gun (I used the one from Angeltech.com)
-Tape
-Paintbrushes
-Hot glue gun
Part One: Making the Base
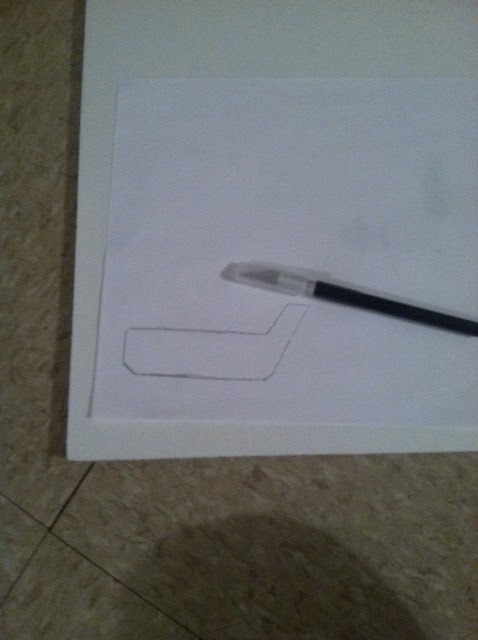
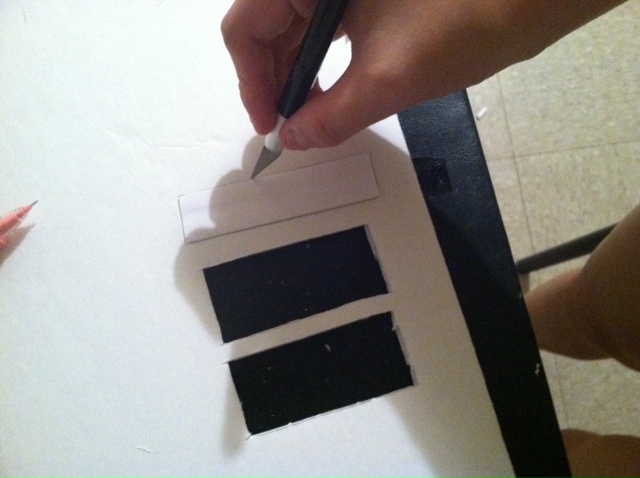
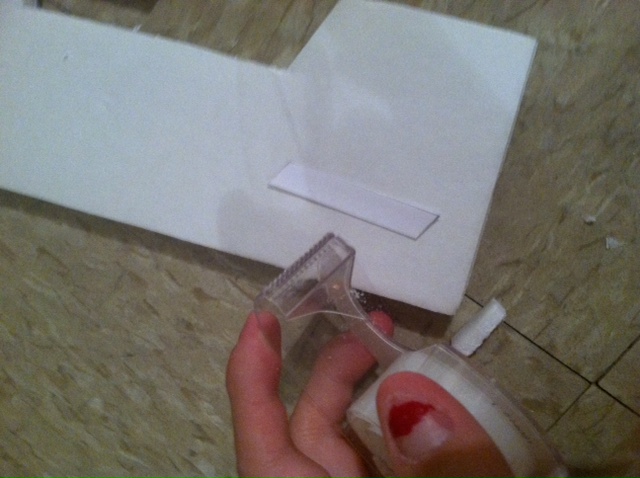
1.Start tracing out the base of the gun.

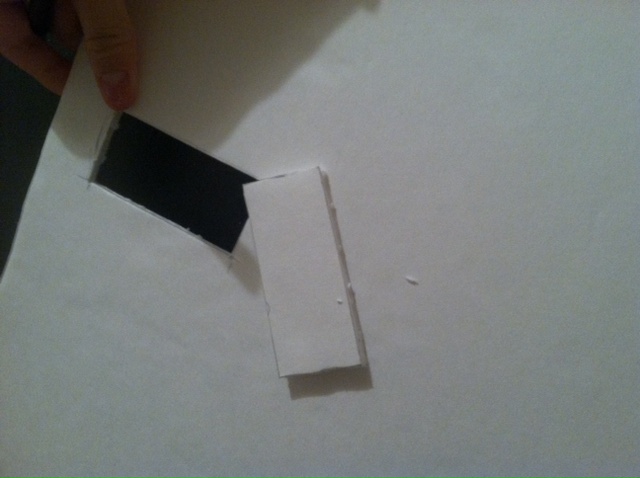
2.Tape the edges of the paper down, so when you cut the board it doesn’t move around. Make sure it’s not too sticky, so just stick the piece of tape behind your hand a couple of times and peel it off. Take your exacto knife and start cutting.

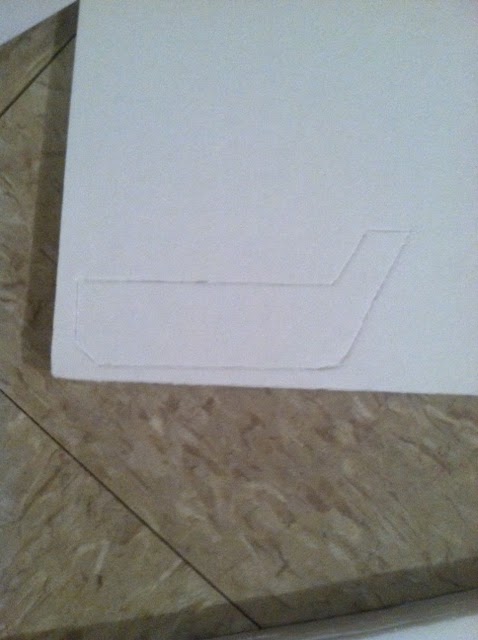
3. After fully cutting into the board, take the paper off, and you should be left with an imprint of the gun in the board. It probably won’t come off, so you’ll have to cut it again with the exacto knife on the other side.

4. Pop the base out and repeat until you have 3-4 copies of the gun ( I used 4 )

5. Take your Elmer’s glue (or whatever glue you want, I didn’t have a hot glue gun on hand so I just used the Elmer’s glue) and start sticking them together

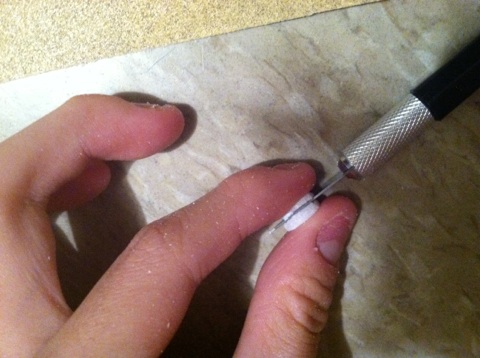
6. Using a flat card (I’m using a random Riot points card I had lying around), start spreading the glue evenly on the gun after you applied the glue. After you’ve done that with each board, just stick them together.


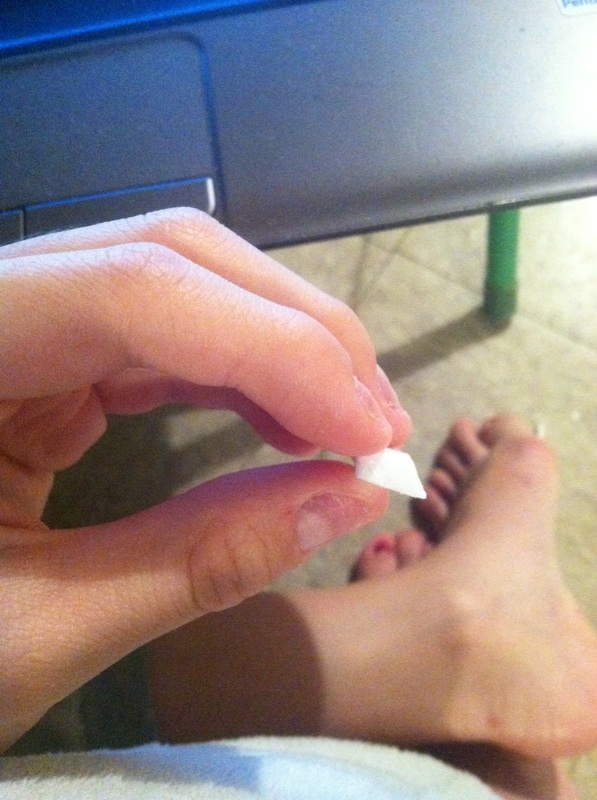
(Ew that thumb tho)

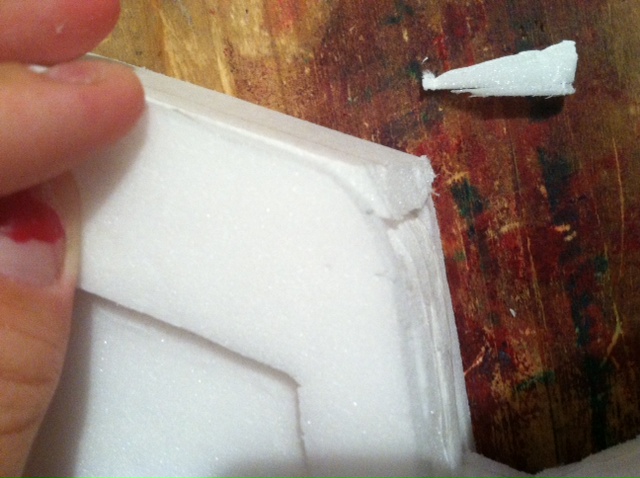
6. After sticking all the board guns together, there should be some glue oozing out the sides. Take a paper towel or tissue and just wipe it away. While the glue is wet, just start adjusting the boards to be as aligned as possible. Then, take your exacto knife and start cutting away at the uneven parts. It doesn’t have to be that even because you’ll cover it with paper mache later on, but just even enough that it doesn’t look too crooked or messy.


7. Depending on your foam board, the paper that’s glued to the foam will start to peel off. I thought they were annoying, so I just peeled them off. But some foam boards don’t even have the paper stuck to them, so this step won’t be neccessary.


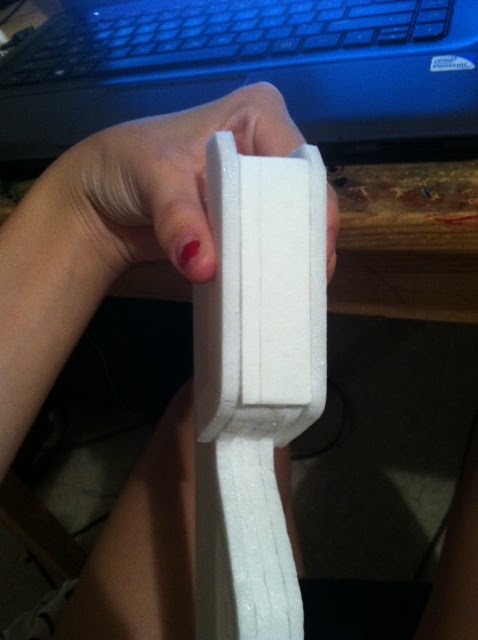
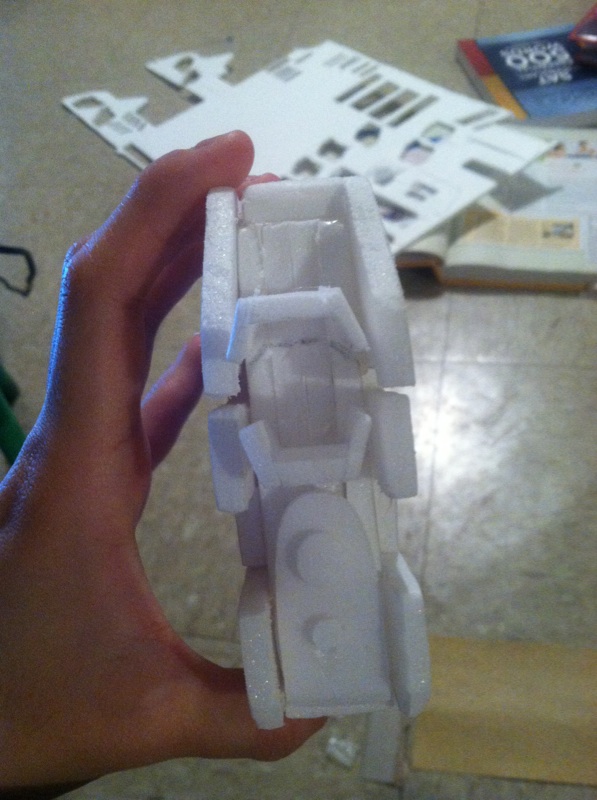
8. *This step is optional*. I found that when I held the gun, the base was too thin. I decided to cut another copy of the gun stencil I drew and stuck it on, repeating the steps from 1-7.

Part 2: Making the individual pieces
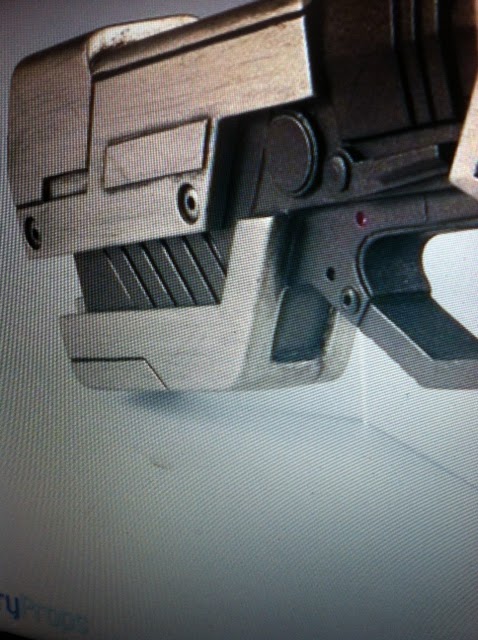
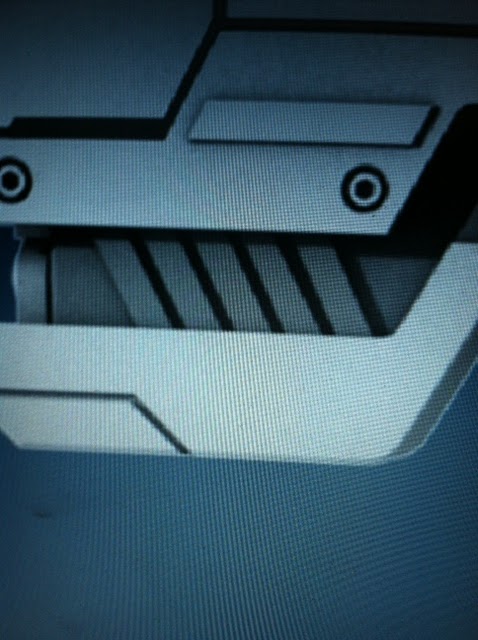
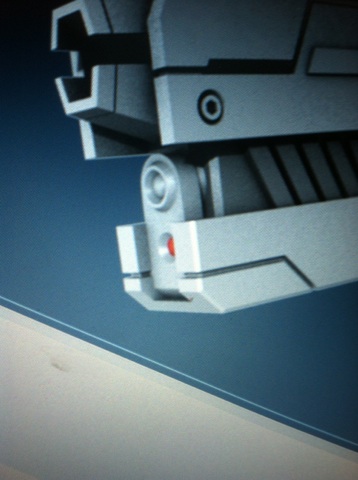
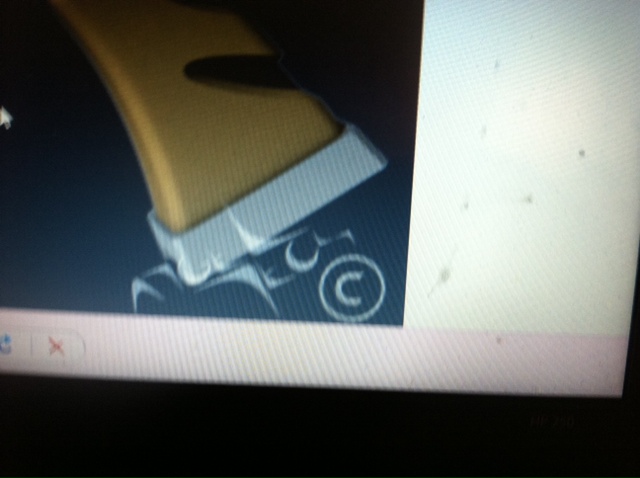
1. Start by looking at references of the gun. I mostly used this diagram from angeltech.com:


I also used pictures a deviantart user named doublezerofx posted of his take on the gun, which helped me a lot since it provided many different perspectives on the gun.
2. Start cutting out the individual pieces out. I put out a diagram that'll tell you which pieces to cut out:
PREPARE YOURSELF! THIS IS GOING TO TAKE A LOT OF DEDICATION AND HARD WORK WITH HORRIBLE NECK AND BACK PAINS!

We will start making the pieces in order:
1.
I start out by drawing it on a piece of paper. You’re going to need to cut out 2 pieces of this.
Trace it onto the foam board and start cutting it out with the exacto knife.
Note: I cut out multiple pieces because I couldn’t get it to be the right shape. Mistakes can be made, and it’s totally fine! If you don’t like how a piece looks, go back and cut another one out until you get it right.
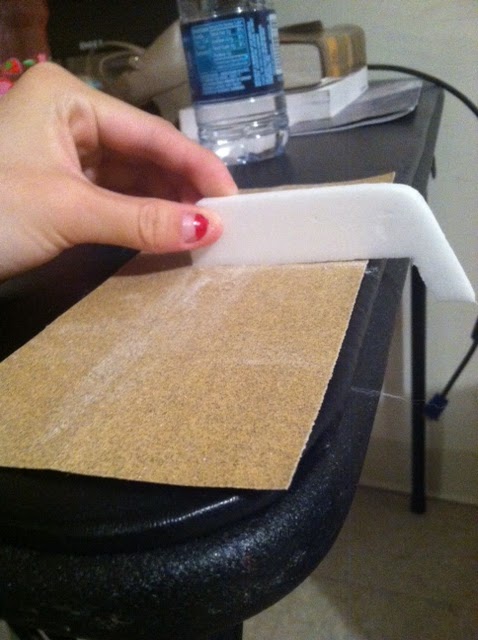
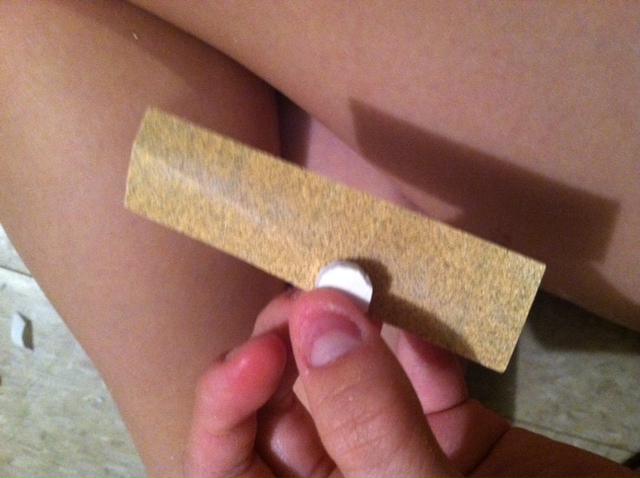
After you cut it, take your sandpaper and start sanding the edges.

Check to see if your piece fits on the gun. If it doesn’t, and it seems out of scale, just create a new piece using the stencil you made of that part, cut it out, and sand it to the desired shape.
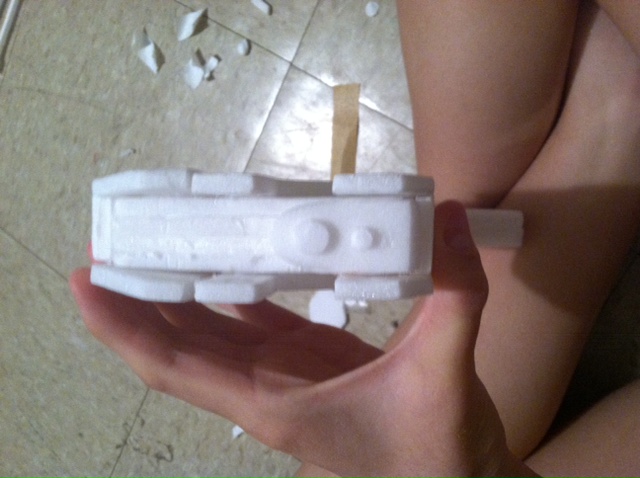
2a. Put the pieces you made into a box or small bag to make sure it’s stored properly and so you don’t lose it. Now, I move on to the bottom of the gun.

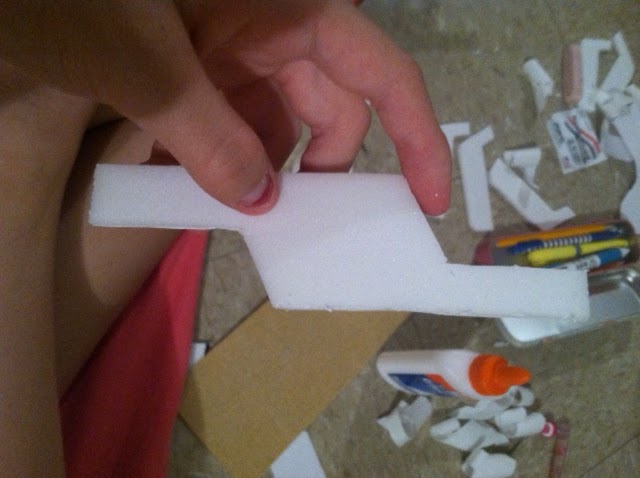
I looked back at the gun references and saw that the bottom of the gun had to be covered. It was going to happen anyway since the layers of foam board was showing, and I wanted to cover it. Measure out the middle (the 4 strips you see in between the pieces we just made). Make sure you measure from the very tip, to the very end (where the curve is).

Put the bottom onto the foam board and mark where you will be cutting.
Now that you made the piece, make sure it fits in between the parts you made.
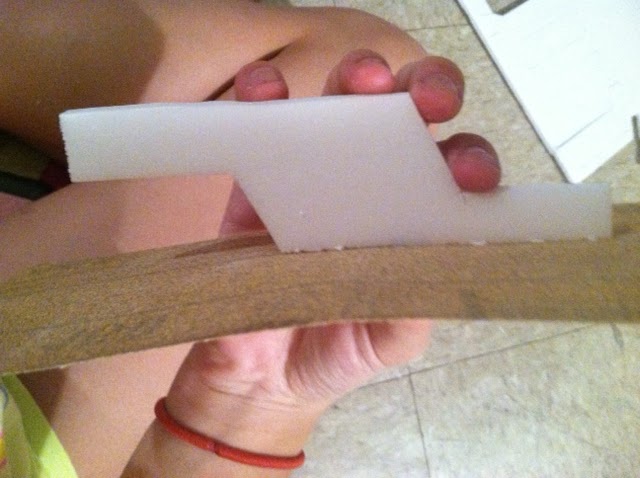
Now you can see, the bottom is covered. Don’t worry about the pieces not really looking connected. We’ll get to that later. For now, just worry about assembling the pieces together. You can see that the rectangle is more angular, rather than a curve. This is where you’ll use the exacto knife.
Using your exacto knife, start cutting away at the edges and try to make it looked more curved.
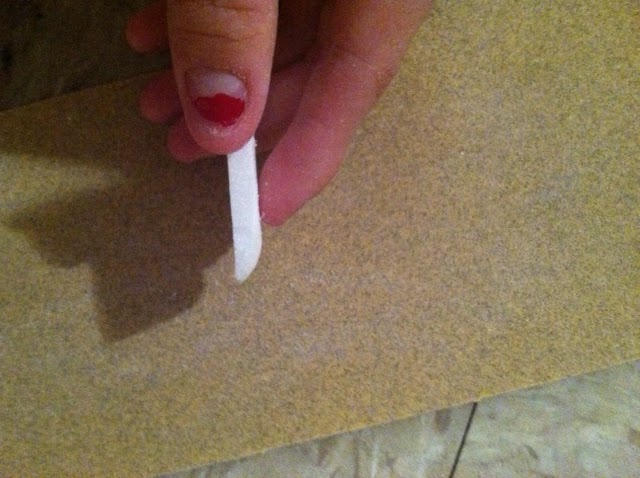
Then take sandpaper and sand away the edges until it looks smooth.
Fit the piece and see if it fits. If the piece is more raised, then continue to sand it down until it fits in between the pieces you just added.
2.

cut out 10 pieces of these slanted rectangles, sand them down with 150 grit sandpaper, then using your hot glue gun paste them on closely together.
user named doublezerofx posted of his take on the gun, which helped me a lot since it provided many different perspectives on the gun.


After I sketched out the piece on paper I transferred it onto the foamboard. I made about 5+ pieces to get it to fit nice and snuggly onto the gun. Going back to the two reference photos, you can see that piece 8 is a lot thinner than the other parts of the gun. I cut it half with the exacto knife and and sanded the edges and surfaces before gluing it down onto the gun.


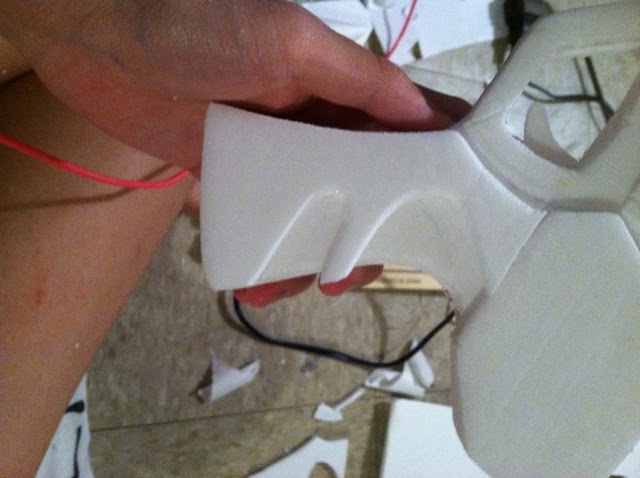
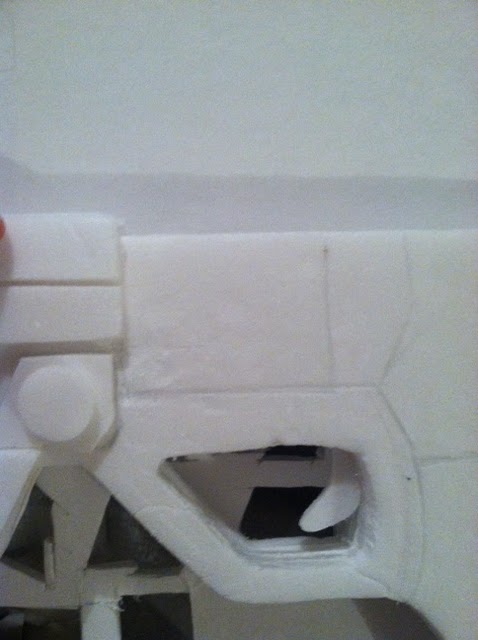
To make part 10, just line the part onto foam board and then start drawing out the shape of the grip and look at the reference pictures while you’re doing so. Repeat to the other side. I didn’t bother connecting both sides in the back because I was getting lazy and you wouldn’t be able to see it if you were holding it.
 12. For this part, I just cut out a rectangle that fit in between pieces 4,5, and 9 (leaving a bit of space between part 12 and part 9). I then sanded it down to a slanted slope and with an exacto knife pressed down two lines as seen in the reference photos. Make sure the line where it slants matches up with the point in part 9 where it starts angling out.
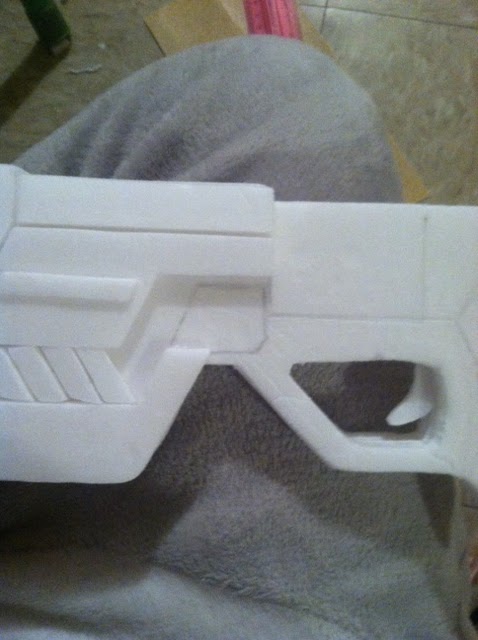
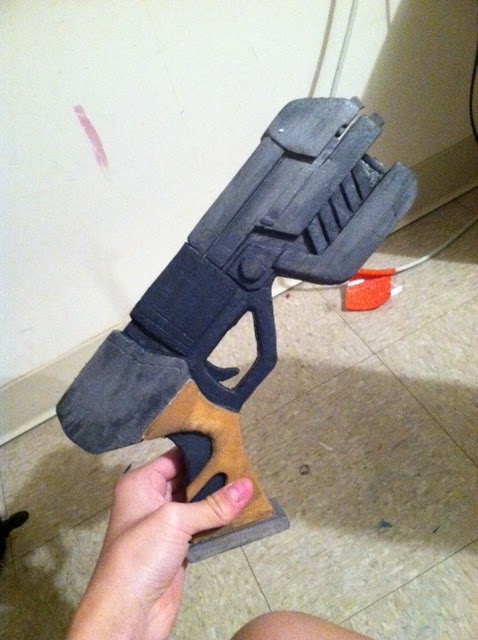 After sanding everything down with 150 grit sandpaper, paint the gun according to the reference pictures. Don't forget to add some shadows so it looks like it's been used a lot to zap some enemies! Let them dry and YOU’RE DONE *epic ending credit music starts playing*
Note: Since we’re using foam board to build this entire gun, it’s going to be tricky. As you can see from the gun, there are curves to it, and foam board doesn’t exactly bend. So, we’re going to have to compromise by cutting the edges with an exacto knife and sanding it down with 150 grit (it actually works pretty well with foam board)
Note #2: Your measurements will probably be different from mine, depending on the size of your base gun
Note #3: Sand ALL of your pieces to make them smooth and to make them look sharp.
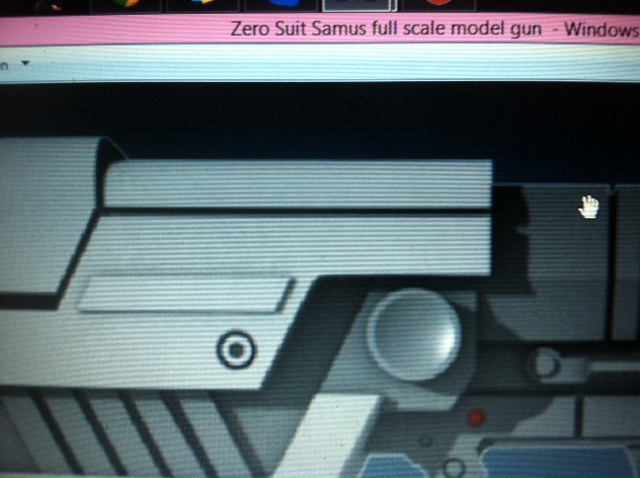
2. Start drawing out parts of the gun you want to build. I’m starting from the left side of the gun and working my way to the right. I’m going to start out by the under part of the gun (the gun part under the rectangles)
I start out by drawing it on a piece of paper. You’re going to need to cut out 2 pieces of this.
Trace it onto the foam board and start cutting it out with the exacto knife.
Note: I cut out multiple pieces because I couldn’t get it to be the right shape. Mistakes can be made, and it’s totally fine! If you don’t like how a piece looks, go back and cut another one out until you get it right.
After you cut it, take your sandpaper and start sanding the edges.
Check to see if your piece fits on the gun. If it doesn’t, and it seems out of scale, just create a new piece using the stencil you made of that part, cut it out, and sand it to the desired shape.
2a. Put the pieces you made into a box or small bag to make sure it’s stored properly and so you don’t lose it. Now, I move on to the bottom of the gun.
I looked back at the gun references and saw that the bottom of the gun had to be covered. It was going to happen anyway since the layers of foam board was showing, and I wanted to cover it. Measure out the middle (the 4 strips you see in between the pieces we just made). Make sure you measure from the very tip, to the very end (where the curve is).
Put the bottom onto the foam board and mark where you will be cutting.
Now that you made the piece, make sure it fits in between the parts you made.
Now you can see, the bottom is covered. Don’t worry about the pieces not really looking connected. We’ll get to that later. For now, just worry about assembling the pieces together. You can see that the rectangle is more angular, rather than a curve. This is where you’ll use the exacto knife.
Using your exacto knife, start cutting away at the edges and try to make it looked more curved.
Then take sandpaper and sand away the edges until it looks smooth.
Fit the piece and see if it fits. If the piece is more raised, then continue to sand it down until it fits in between the pieces you just added.
2
.
.
cut out 10 pieces of these slanted rectangles, sand them down with 150 grit sandpaper, then using your hot glue gun paste them on closely together.
3. 
Cut two of these out and sand them till you smoothen them out. Then take your hot glue gun and paste them on each side.
4. 

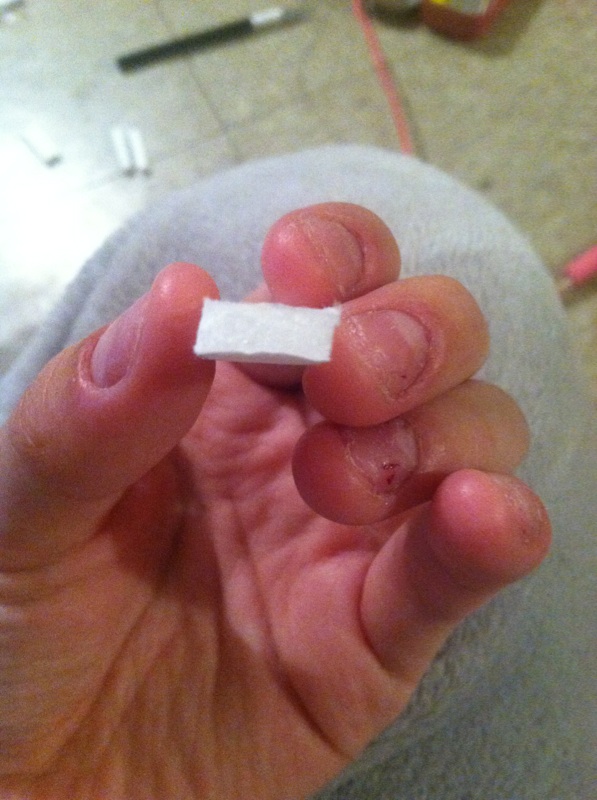
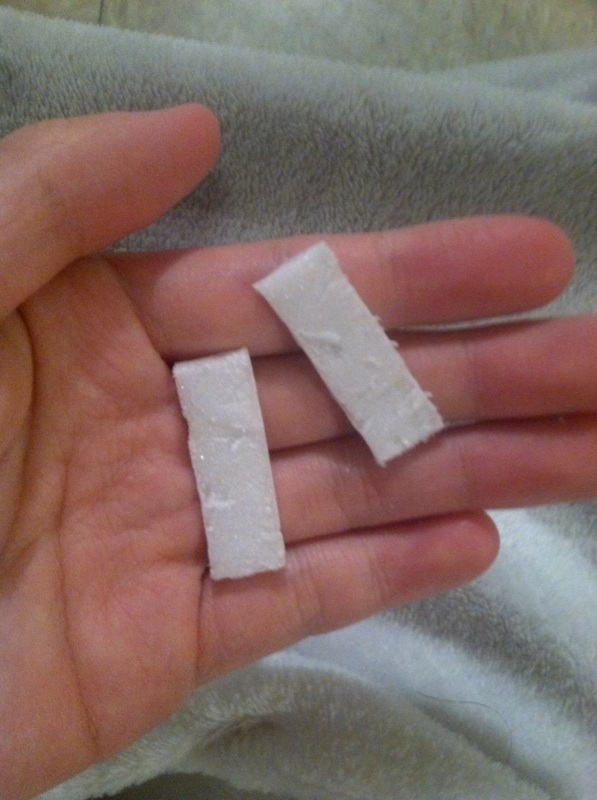
Cut one of the rectangles out, and sand it. Then, taking your exacto knife, cut the rectangle in half to make two thinner rectangles. Taking your hot glue gun, glue it on top of part #3.
5.
To make this part, cut out a long rectangle that’s width matches the width of the base gun you made. Then to make the sides, cut out two long rectangular pieces that align with the length of the top part of part #3. We’re not going to glue these pieces yet. Hold onto them.
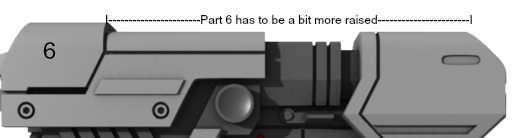
6. To make this piece, trace out two of the pieces onto the foam board. To make the top piece that’ll connect both pieces, cut out a rectangle that’s the length of the top of piece 6 and the width of the base gun. Before gluing it together with a hot glue gun, sand the edges down with sandpaper.
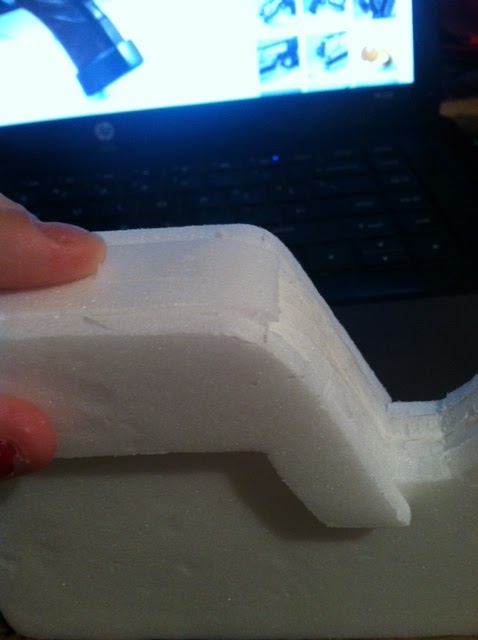
NOTE: Make sure piece 6 is more raised than the others as seen in this picture, then when you assemble everything, you can it down and all the other pieces as well to make it look more proportionate.
7. This piece is pretty hard to make, so bear with me as I try to explain.
Depending on the width of your base gun (mine’s was 4 cm, I think), take out 2 cms. The sides will be slanted outward like half a hexagon. Take your sandpaper and start sanding the sides until you get a shape like the third picture.
Cut a rectangle and and then cut it in half. Then sand it. Repeat the previous steps and then taking the two half hexagon looking shapes, paste them inside like the 2nd picture.
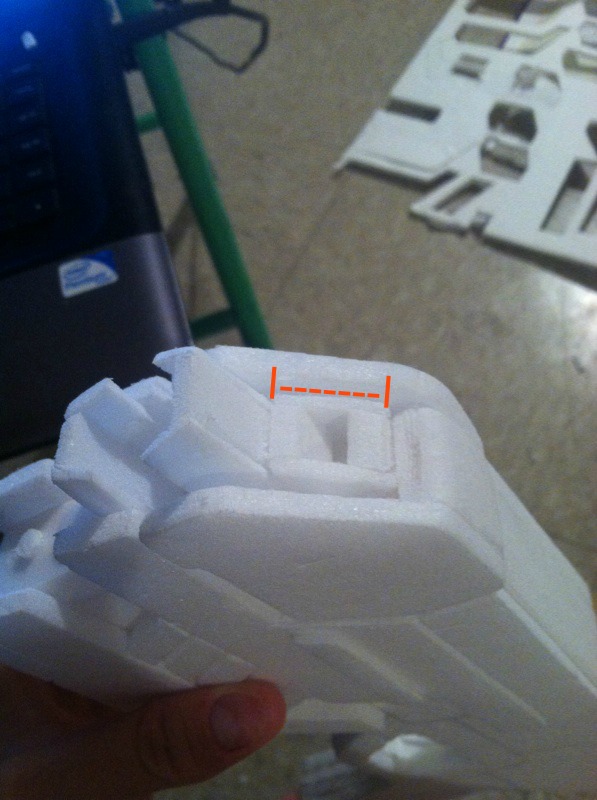
Now, to make the slanted rectangle shape on top of the gun opening, we need to cut out two rectangles from the foam board and two thinner rectangles:
-Measure from the top of the gun opening to the bottom of the top part of the gun. Cut out two rectangles that fits the width and the length of that area.
After you cut the rectangles, cut another rectangle with the width measuring from the bottom of the top part of first rectangle (the top one) and the bottom of the rectangle (the bottom one), as seen in the second picture.
-Take your exacto knife and cut it slanted. This should be parallel to the slant of the gun coverings on the sides. Hot glue the pieces together and taking a 150 grit sandpaper, sand them to make them smoother.
To make this part, cut out a shape that resembles Bloo from Fosters home for imaginary friends. Sand the edges to make them look smoother. Cut out a circle and cut it in half. Sand one of the circle pieces into a smaller circle, and sand the general shape of the leftover circle. Taking your hot glue glue the bigger circle on top and glue the smaller circle on the bottom.
8. This part took a lot of tries for me to get it to nicely fit. It’s going to be hard to describe so bear with me, again.
For the measurements, make sure it lines up with part 1 like this : / (lines up diagonally), and it fits under part 3 (not too tightly, but about 2-3 mm in between the pieces. Also, make sure the side of the piece is a few mm’s before part 3 and 5.
I sketched out part 8 onto the base of the gun and using a small straight edge and fit it to mark each side.
After I sketched out the piece on paper I transferred it onto the foamboard. I made about 5+ pieces to get it to fit nice and snuggly onto the gun. Going back to the two reference photos, you can see that piece 8 is a lot thinner than the other parts of the gun. I cut it half with the exacto knife and and sanded the edges and surfaces before gluing it down onto the gun.
To finish off the piece, I just cut out a large circle, sanded the edges and pasted it on top with the hot glue.
Repeat for the other side
9.

I didn’t have any pictures for this since I forgot to take them D:! I’ll try to explain it as best as I can.
-Start sketching out the piece on a piece of paper. Make sure it aligns with the top of part 5. I don’t have a picture of what I did, but in a nutshell, I put the gun on a piece of paper, and using reference photos I sketched around the gun (adding the width of the foam board into the sketch). Make sure you get that weird trapezoid shape in between part 12 and part 9. Make two of these and then cut out a piece of foamboard that has the width of the base gun and the length of the top part of part 9. Do the same for the rest of the edges around it. To create the black line, I just took an exacto knife and gently pressed it down to make an indent
10.
To make part 10, just line the part onto foam board and then start drawing out the shape of the grip and look at the reference pictures while you’re doing so. Repeat to the other side. I didn’t bother connecting both sides in the back because I was getting lazy and you wouldn’t be able to see it if you were holding it.
11. To make the trigger, I just drew a little boomerang shape and hot glued in where the trigger would be on the gun.
13.
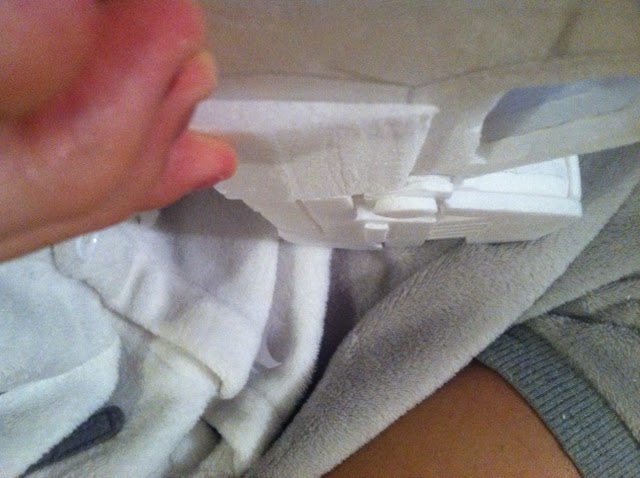
I drew out 1 cm width rectangles (the length measuring the sides of the bottom of the grip) and hot glued them down.
*NOTE: I didn't have enough time to put on the paper mache,
but it came out very well without it!
If you do want to do paper mache, then go right ahead, but I didn't.
IF YOU HAVE ANY QUESTIONS ABOUT THE MAKING OF THIS GUN,
CONTACT ME AT XOXOASIANGURL43VERXOXO@GMAIL.COM
( don't judge I made this email when I was 12)
No comments:
Post a Comment