...

Tuesday, October 20, 2015

Clinic Hair dye in Blue Black Review

     It's starting to get colder and it's getting darker faster. To match my hair to the colder months, I decided to dye my hair a more sinister color, and a color I've been wanting to dye my hair for a long time, blue black.  
    Since I enjoyed the last Clinic hair dye, which was the red one, I decided to buy the blue black one that they were selling. I went with the regular Clinic hair dye, not the henna one.

NOTE: I had red, bleached hair before I dyed it the blue black hair dye. Therefore, you might not have the same results as I do. 

Process: ****
-As usual,  I made a mess dying my hair. The hair kit was exactly like the last Clinic hair dye I reviewed, with the included comb  and poncho. While I was washing the hair dye out, the water became clear within 20-30 minutes of rinsing it out. The included shampoo and conditioner was sufficient for my short hair, but you can use your own shampoos and conditioners as well.

Color: *****
-I LOVED the color! At first, the dye on my hair looked green , so I started to get worried. But slowly, I saw the color process and it turned into this beautiful blue black color. The blue can be seen in the sunlight and brighter lightings, but it just looks like a really dark blue black color on the hair. However, I saw the blue kinda fading out of my hair after the 2nd wash, so that's upsetting. I didn't really mind if the blue faded because I was aiming to have black hair anyway. But, the blue tint is there!

Price: *****
-It's 8.99, around $9.30 with tax. It's in the drugstore box hair dye range, but with more freebies. You can buy this at any asian beauty store, but you can also order it online if you'd like.

This photo doesn't really show the blue tint, but this is after the 2nd -3rd wash of my hair. 
But, like I said, you can definitely see the blue tint in the sunlight. 


OVERALL: 

I would definitely recommend this hair dye brand. The blue black is actually a blue black, unlike other "blue black" hair dyes that claim that they are the color, but it's just a flat out black. It didn't really damage my hair, and make it feel more softer after dying it. I've gotten a lot of compliments on my hair! Maybe next time I'll purchase the henna version of this one. It does fade quickly; for me it faded within a week or so (depends on how many times you wash you hair, I wash mine nearly everyday ). So, maybe the henna version might work out better next time. 


Tuesday, October 13, 2015

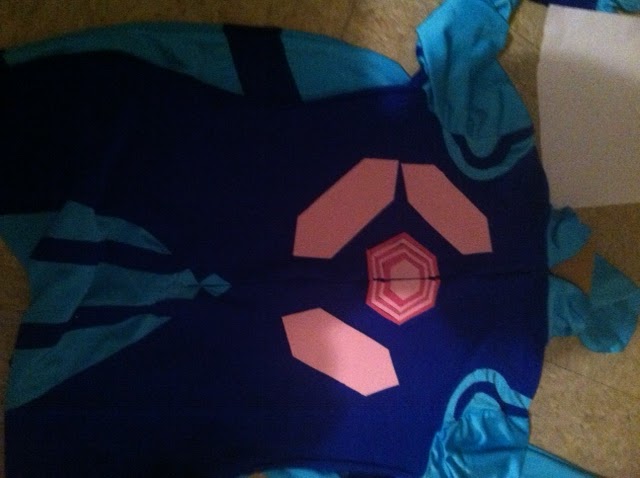
DIY Zero Suit Samus Emblem

DIY Zero Suit Samus Emblem


DO YOU WANT TO LEARN HOW TO MAKE A ZERO SUIT SAMUS EMBLEM? WELL YOU’VE COME TO THE RIGHT PLACE. Mind the caps; I just find it frustrating that you can’t really find tutorials on how to make a proper zero suit Samus cosplay. I’ve researched a lot about I’ve yet to find a tutorial that’ll guide me on how to assemble the entire zero suit Samus costume. If you’re struggling to find a way to make the emblem for the suit, you’ve come to the right place.

Materials needed:
-Light pink and Dark pink craft foam paper
-I got the colors “Pink” and “Medium Pink”

-E6000 glue or a strong fabric adhesive
-Exacto knife or scissors
-Reference photos of the emblem
-Cardboard (to protect the suit on the inside when you apply the E600 or any other strong glue)

Let’s get started!

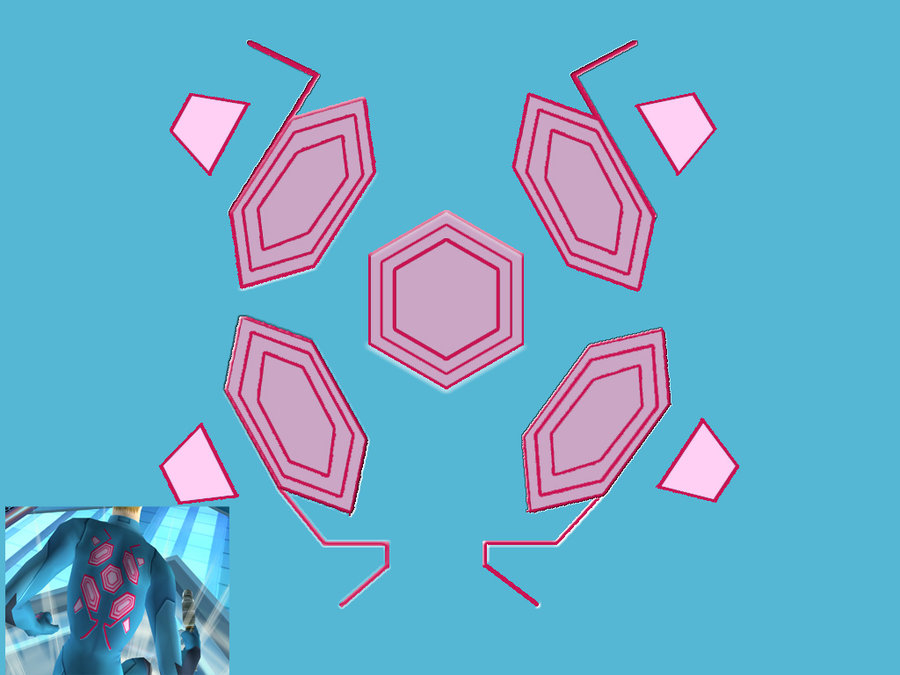
1.Start studying your reference picture(s) and trace them out onto a sheet of paper. Depending on your back size, you might want to make it smaller or bigger. If your zipper is in the back, don’t worry about it for now. We’ll get to it later.

zero_suit_samus__front_logo_by_hexigonaran-d3ensv6.jpg
This is the front of the suit, and it should be placed on your left breast (the lines on my suit were too thick, so I wasn’t able to stick it on)

zero_suit_samus__back_logo_by_hexigonaran-d3ent2h.jpg
Zero suit samus-21-620x.jpg
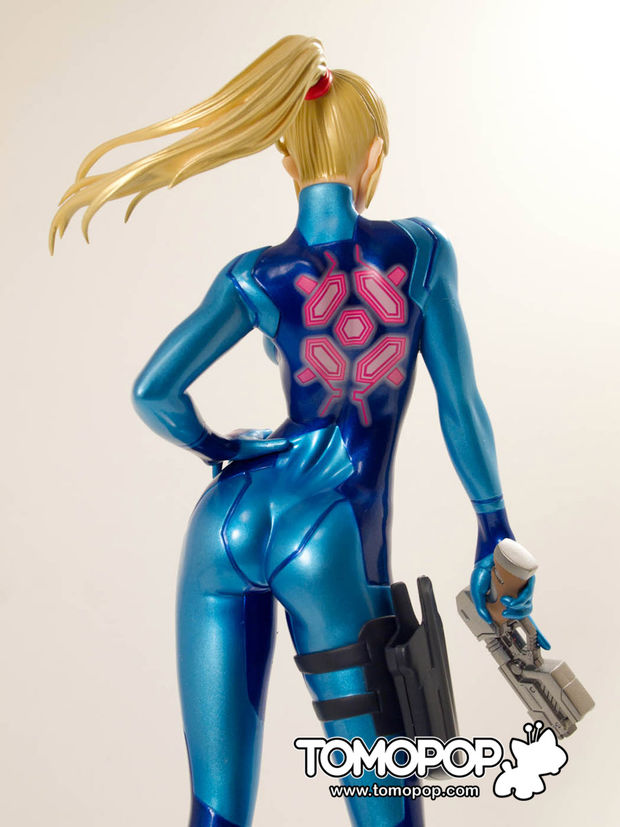
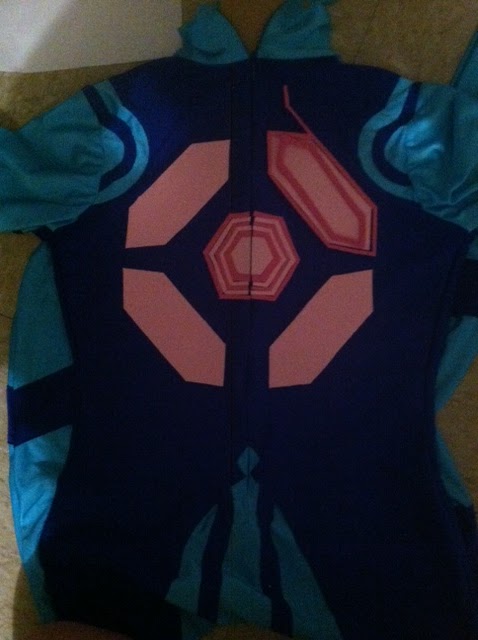
These are close ups of the emblem that’s placed at the back of the suit.

NOTE: Not all zero suit samus cosplays are alike! You don’t have to make it perfect, as long a you put in the effort, it should turn out amazing!

2. Start with the hexagon
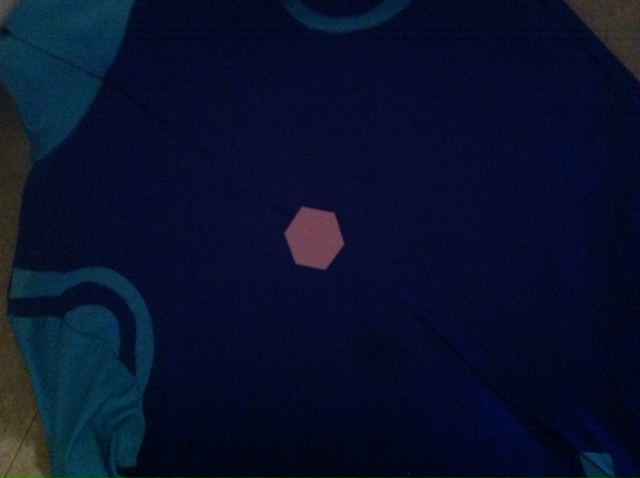
*NOTE* I screwed up on this part. It looks really messy and weird. I suggest you tape up
the pieces first on the back, then cut it in half and glue it onto the suit using E600 (make
sure you wear a mask, this stuff stinks and can be pretty bad for you)

photo 3.JPGphoto 4.JPG
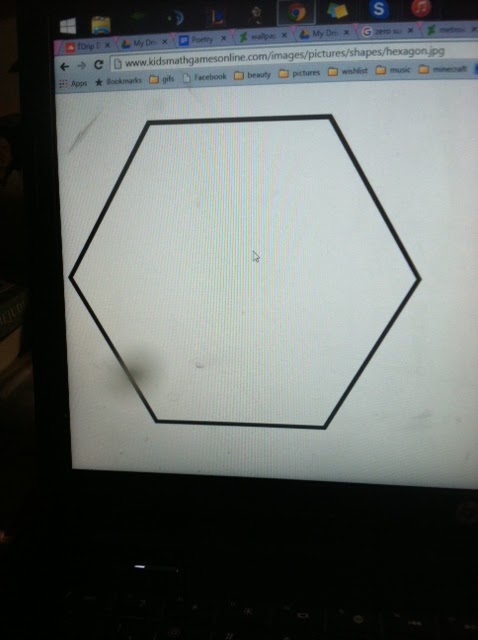
-I looked up a picture of a hexagon, and zoomed in and out to make it it scale with my suit.

photo 5.JPG
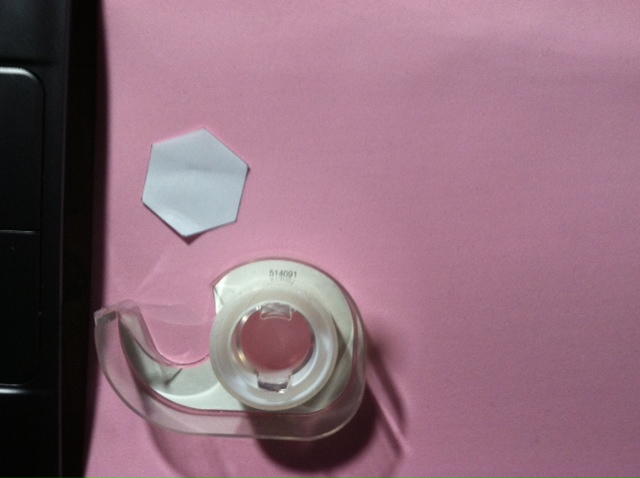
-Cut out a pink piece first. This will be the center of your hexagon
photo 1.JPGphoto 3.JPG
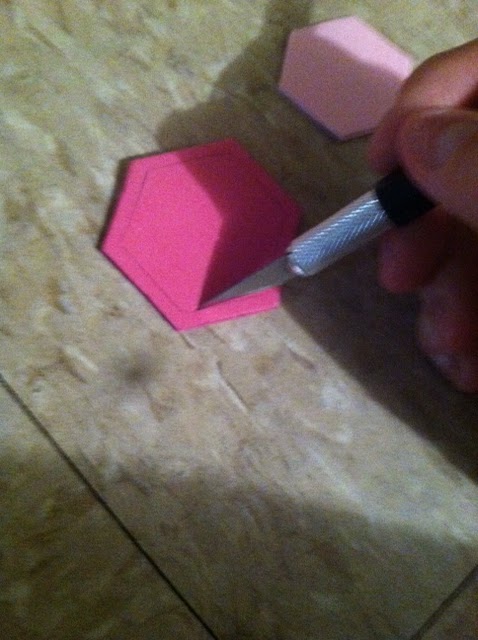
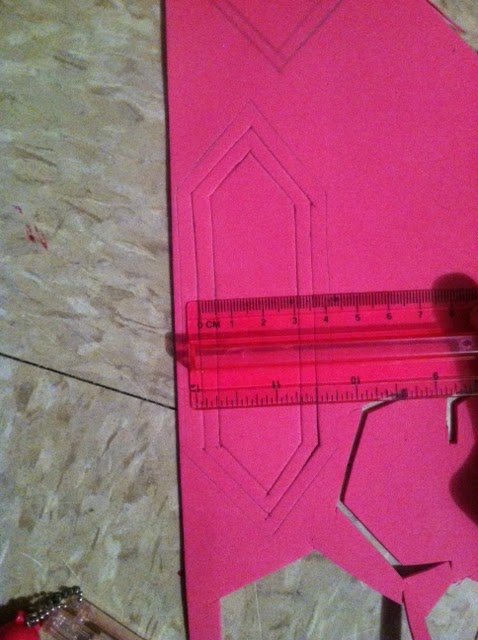
-I traced out the original hexagon shape onto the dark pink foam and traced it. Trace about 0.4 cm’s in width around that stencil.

photo 2.JPGphoto 2.JPG
-The pattern of the hexagon should include 1-2 lines of pink and 2-3 lines of dark pink that surrounds the original hexagon that you drew out. Before I glued the pieces on, I put a piece of cardboard that was about the size of my upper body inside the suit to protect it from sticking to the other side.
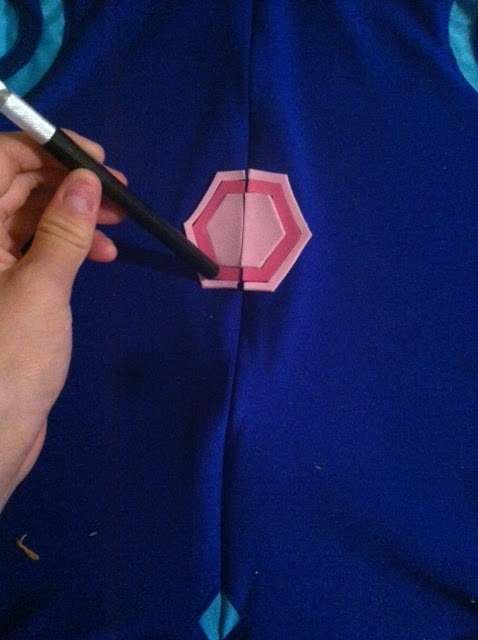
-Then, take a strong adhesive (I’m using E6000) and stick it on. I highly recommend you wear a mask when you use E6000 because of the awful smelling fumes it gives off. Make sure you crack a door open so those fumes don’t linger in your room. I used the back of my exacto knife to press the hexagon pattern onto the suit.
NOTE: If the zippers on the back of the suit, then you have to cut your design in half and stick it on. I suggest you take tape, attach the pieces together by applying the tape to the back, and then sticking it on rather then putting them on individually like I did here (it came out gappy and messy looking).

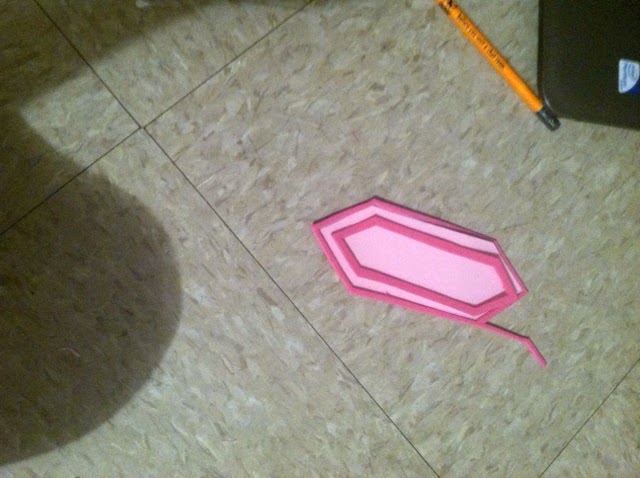
3. Start making the weird horizontally hexagon shapes.

-It’s basically the same process as the hexagon. I didn’t make these as detailed because it took too much of my sleeping time away, my back and neck was killing me from bending down too long to cut them out, and I got lazy.

photo 4.JPG
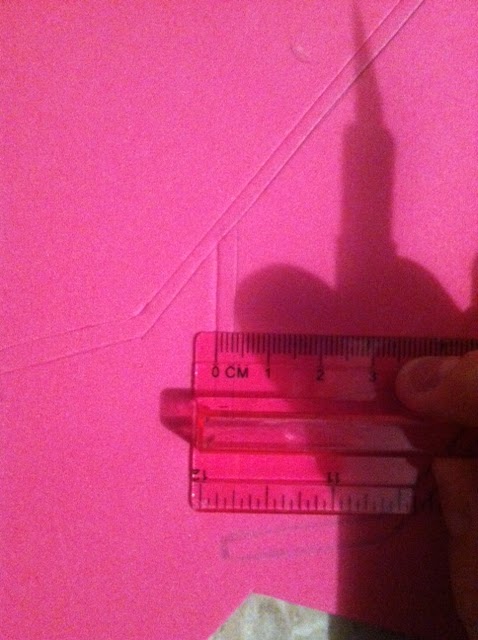
-Again, the width of each line going from pink, dark pink, pink, dark pink, should be 0.4 cm. It shouldn’t be too thick or too thin.

photo 1.JPG
This is how mine turned out. As for the line sticking out of it, I measured about 4 cm’s and 0.4 cm width on it from where it begins to where it ends. The angled line was 2 cm’s with a 0.4 cm width.

-Repeat this for all the others.

zero_suit_samus__back_logo_by_hexigonaran-d3ent2h.jpg

photo 4.JPG

As you can see, mine’s stuck straight up instead of being angler, which is my mistake, but it still looks cool.

4. After you’ve made all the pieces, stick them onto the suit using E6000 glue.

*MAKE SURE YOU WORK IN A WELL VENTILATED AREA AND WEAR A MASK TO PREVENT BREATHING IN THE DANGEROUS FUMES!*


Tuesday, September 22, 2015

Maybelline Chai Latte Eyeshadow Quad review

    And, we're back! I haven't posted anything during the entire summer, so excuse the really long hiatus. My Dolly wink eyeshadow quad just broke and I wanted to find a more cheaper dupe for it. I picked up the Maybelline Chai Latte eyeshadow quad at my local drugstore and I gotta say, it's my go to eyeshadow now! It's great for day and night makeup.

Pigmentation: ***
-It's fairly pigmented, but not transparent. You can see it when you apply it, but like any other eyeshadow, it'll fade throughout the day. I suggest you use the Wet n Wild fergie eyeshadow primer (my favorite eye primer right now) or any other eye primer to really amplify the color.

Quality: *****
-I really like the texture of these eyeshadows. They're really nice and smooth to apply to the eyes, blend out nicely, and gives a really nice and natural effect to your eyes for day time makeup.

Price: *****
-It's not as cheap as the wet n wild eyeshadows, or the elf eyeshadows, but the price point is very affordable for anyone on a budget. I suggest going to Target or Walgreens to really get it at a cheaper price. 

Packaging: ****
-It's pretty simple, but it looks sleek and professional looking. I really like the two sponge tip applicators that are included because they really pack on color. It's good for on the go if you don't have enough space in your makeup bag to carry makeup brushes. But, something I don't really like is how the eyeshadow gets all over the inside, making it look like a mess. 

OVERALL: I'd recommend this eyeshadow palette. It's pretty cheap and has a decent amount of pigmentation. I really like this eyeshadow palette and I've been using it a lot, and my a lot I mean everyday.


These are the pictures for the Maybelline Chai Latte eyeshadow. It is inexpensive but has fairly reasonable quality that is good for both day and night. Picture taken by Kelly Leem. Captioned/Collaged by Yealin Lee.

Colors swatched without primer

How the front of the quad looks like 

How the back of the quad looks like. I like the added eye chart, it's great for beginners.


Monday, June 8, 2015

Zero Suit Samus Makeup Tutorial


Getting Ready for Comic Con 2015
by Kelly Leem, junior fashion blogger


It’s my first time ever going to Comic Con! I can already tell, there will be a lot of people attending Comic Con New York since all the tickets sold out within two days! Yes, the waiting line was annoying, and the very limited amount of tickets offered and sold was crazy! But, it’ll be a fun and new experience for me.

I decided I would cosplay as ZERO SUIT SAMUS!

I’m only 17, so doing any of the other characters I wanted to cosplay would be WAY too revealing. Zero Suit Samus is just about right for a professional looking cosplay, while not being too revealing.

Here are the items you’ll need to cosplay as Samus:

-Red hair colored ties
-This is the original gun that you can make if you’d like. I personally don’t really know how to make props yet, so I just bought this gun instead.
-Gun holster
-This is optional. Some versions of zero suit Samus has it, but in the smash version of her, she doesn’t.


The Makeup:

If you look closely at her makeup, it’s very natural. If you compare all the different zero suit Samus faces, you’ll see that she has a natural matte, warm brown/taupe, smokey eye, paired with a black cat eye. On her lower lashes, the black liner only goes to about half her eye, and then gradiates to a brown liner that outlines her entire lower lash line. Her entire lower lash line is then shaded with the same brown that’s in her smokey eye. Her lips are a warm, brownish, nude color.

-If you take a look at the closeup of her face, you can see the subtle matte brown smokey brown eye, as well as the outline of the lower lash line with the brown gel liner. She has the thin, black cat eye, and nice fluttery lashes that are more prominent on the outer corners. She has fuller, brown nude colored lips, and her face is not too luminous or matte. It’s more of a satin finish.

photo 3.JPG

1) Base Makeup:
-Before applying any makeup, apply a primer to your face to make sure there’s something for your makeup to stick onto so it lasts longer.
-Primer recommendations:
-Smashbox photofinish primer
-Maybelline Baby Skin
-NYX dewy finish makeup setting spray
-Tip: Applying a setting spray before applying
makeup will help it to adhere better.
-What I will be using: Smashbox photofinish primer, Maybelline Baby Skin, The Face shop makeup base 02 (violet).

-Apply a light foundation, that has a natural but luminous finish. Samus’ s skin leans more towards the yellow based pale skin, rather than the usual pink toned pale skin.
-Foundation recommendations:
-Covergirl Outlast Foundation: Buff Beige
-Maybelline Fit me Foundation: 115
-Covergirl Stay Luminous Foundation: Buff Beige
-Any light liquid foundation that you might have
-What I will be using: A mixture of a light bb cream from The Face Shop, and Covergirl Stay Luminous Foundation: Buff Beige
-Tip: If you’re taking pictures, avoid foundations with SPF to prevent flashback.

-Optional: If your foundation is more matte, apply a little bit of face oil (coconut oil, etc), or a luminous makeup base:
-Recommendations for a luminous look:
-Loreal Lumi Primer
-Tony Moly Aura Beam.


2) Eyebrows
-Now that your base makeup is done, let’s move on to the eyebrows
-Samus’s eyebrows are straighter, thinner, slightly arched, and a dark brown color.
Eyebrow Recommendations:
-Dark brown eyebrow powder/pencil of choice
-NYC brow powder
-Milani eyebrow kit
-Wet n Wild eyebrow kit
or
-Cream or gel eyebrow product
-NYX eyebrow gel: Brunette
-Maybelline gel liner: Brown
-Yes, you can use this on your eyebrows.
-Optional: Eyebrow gel to keep your eyebrows in place
-L'oreal Brow Stylist, Medium Brown
-Fill your eyebrows lightly, so it doesn’t look too thick. If you have thinner eyebrows, make them a bit more fuller and darker.

3) Eyesphoto 1.PNG

-Samus is rocking a subtle brown smokey eye, a black cat eye, brown gel liner on her lower lash line that’s smoked out by the same brown on her eyelid, nude eyeliner on her waterline, and nice black flared lashes.
-Start by applying an eyeshadow primer on your eyelids and lower lash line, to prep them for eyeshadow application
-Recommendation:
-Milani Eyeshadow Primer
-Apply a medium dark, matte, brown eyeshadow onto your eyelids as your base color.
-Recommendation:
-NYX Love in Paris Eyeshadow Palette: Merci Beaucoup
-Lower right corner, dark eyeshadow
-Start to smoke out the brown eyeshadow you previously applied with a warmer brown eyeshadow in the crease.
-Recommendation:
-NYX Love in Paris Eyeshadow Palette: Merci Beaucoup
-3rd row down, middle eyeshadow color, warm camel brown color.
-Use the same brown eyeshadow that you used on your eyelid, onto your lower lashline.
-Recommendation:
-NYX Love in Paris Eyeshadow Palette: Merci Beaucoup
-Lower right corner, dark eyeshadow
-Use the same warm camel brown color that you used to blend out the dark brown eyeshadow to diffuse the darker brown eyeshadow you used on your lower lashline.
-Recommendation:
-NYX Love in Paris Eyeshadow Palette: Merci Beaucoup
-3rd row down, middle eyeshadow color, warm camel brown color.
-Line your upper lashline with a black eyeliner, winging the end of the liner into a thin cat eye.
-Recommendations:
-Loreal Gel Liner: Black
-Wet n’ Wild gel eyeliner: Black
-Liner your lower lashline with a dark brown gel liner, and try to get the shape of Samus’s eyes (more rounded out and almond shaped). Make sure you apply a waterproof liquid liner under her eyes to make sure they don’t move around (this is a must for watery eyes!)
-Recommendation:
-Maybelline Gel Liner: Brown, mixed with a black gel liner.
-Wet n Wild H20 Proof liner: brown
-To widen your eyes, use a nude eyeliner on your waterline.
-Recommendations
-NYX wonder pencil
-Rimmel Scandaleyes liner: Nude
-Curl your lashes, and apply your favorite black mascara (make sure it’s waterproof!) on both your top and bottom lashes.
-Recommendations:
-Maybelline Chaotic Lashes Mascara: Black (waterproof)
-Maybelline Full n Soft Mascara: Black (waterproof)

4) Cheeks/Contour
-Samus doesn’t really have DEFINED facial features, but from what I can tell in her pictures, she rocks a natural highlight on her cheeks and a little bit of bronzer.
-Apply a light dusting of a yellow based highlighter onto your skin
-Recommendations:
-Mary Lou-Manizer Luminizer
-Wet n Wild: Reserve your Cabana highlighter
-Take a bit of bronzer on your brush, and swipe it under your cheekbones to add a bit of definition.
-Recommendations:
-NYC Big Bold Bronzer
-Samus has a nice and defined nose.
-Use a contour color, and apply it onto the sides of your nose to make them look taller
-Recommendations:
-Ebay cream concealer (a concealer a few shades darker)
-Dark Brown eyeshadow
-NYX blush in Taupe
-Use a highlighting color onto the bridge of the nose to create the illusion of a taller nose.
-Recommendations:
-Mary Lou-Manizer Luminizer
-Wet n Wild: Reserve your Cabana highlighter
-Swipe a bit of contour color under your lip to make the chin look a bit more deep set.
-Recommendations:
-Ebay cream concealer (a concealer a few shades darker)
-Dark Brown eyeshadow
-NYX blush in Taupe

5) Lips
-Samus’s lips aren’t too full, but they aren’t too thin. She rocks a nice browny nude color on her lips.
-Apply a nice browny nude color onto your lips. Make sure you make the lip line a bit defined
-Recommendation:
-Maybelline The Buffs Lipstick: Stormy Sahara

AND FOR THE FINAL TOUCHES…*DRUMROLL*
-Add Samus’s classic beauty mark on the left part of her chin using a brown gel liner.
-Also, use a make up setting spray to lock in your makeup and make it look less powdery
-Recommendation:
-NYX Dewy makeup setting spray

Tip: For added special effects, you can add a DIY baby metroid munching on the side of your head if you’d like :3!